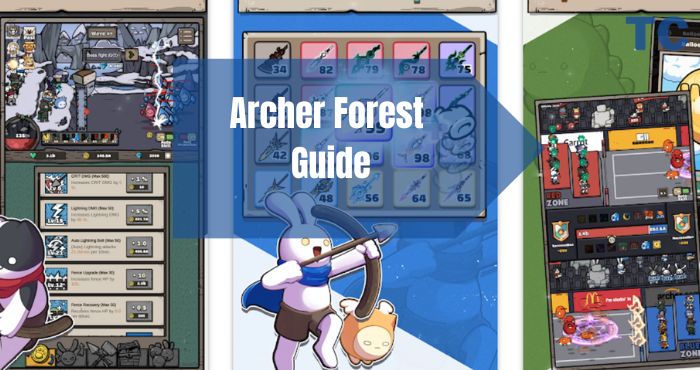
Aether Gazer Ai Chip Guide – Here is List of All Ai Chip

Welcome to our Aether Gazer Ai Chip Guide, In this Aether Gazer Ai Chip Guide we will tell you about All the Ai Chip available in Aether Gazer.

So come and take a look at this Aether Gazer Ai Chip Guide.

Aether Gazer Ai Chip Guide

Marginal Benefit: Good for mob stages, excellent for boss stages. Extends Zero Time triggered by AI teammates by 1 second and increases AI teammates’ damage by 15% while in Zero Time or Modified Mode.

Battlefield Dominance: Good for mob stages, somewhat less effective for boss stages. Increases AI teammates’ attack by 5% for each enemy on the field, up to a maximum of 20%.

Sudden Offensive: Useful for extended fights. Increases AI teammates’ attack and defence by 2% for each Ultimate cast, up to a maximum of 5 stacks.

Jin-ei (Iron Rain): Only useful when S Kuninotokotachi is used as an AI teammate. Allows you to choose the elemental debuff you want applied. S Kuninotokotachi as an AI will only cast the Water Ultimate.

Jin-ei (Sickle Wind): Only useful when S Kuninotokotachi is used as an AI teammate. Allows you to choose the elemental debuff you want applied. S Kuninotokotachi as an AI will only cast the Wind Ultimate.

Jin-ei (Clap of Thunder): Only useful when S Kuninotokotachi is used as an AI teammate. Allows you to choose the elemental debuff you want applied. S Kuninotokotachi as an AI will only cast the Lightning Ultimate.

Jin-ei (Earthly Flames): Only useful when S Kuninotokotachi is used as an AI teammate. Allows you to choose the elemental debuff you want applied. S Kuninotokotachi as an AI will only cast the Fire Ultimate.

Early Sakura (Accelerate): Only useful when S Ookuninushi is used as an AI teammate. Alters the tarot card drawing behavior. S Ookuninushi as an AI will never draw the Lovers card and will draw the Death and Chariot cards in sequence.

Early Sakura (Universal Love): Only useful when S Ookuninushi is used as an AI teammate. Alters the tarot card drawing behavior. S Ookuninushi as an AI will prioritize drawing the Lovers card when the team leader’s HP is below 80% and draw all 3 tarot cards in sequence when the team leader’s HP is above 80%.

Early Sakura (Gentle): Only useful when S Ookuninushi is used as an AI teammate. Alters the tarot card drawing behavior. S Ookuninushi as an AI will prioritize drawing the Lovers card when the team leader’s HP is below 40% and draw all 3 tarot cards in sequence when the team leader’s HP is above 40%.

Early Sakura (Benevolence): Only useful when S Ookuninushi is used as an AI teammate. Alters the tarot card drawing behavior. S Ookuninushi as an AI will prioritize drawing the Lovers card when the team leader’s HP is below 20% and draw all 3 tarot cards in sequence when the team leader’s HP is above 20%.

Archaic Oath (Lightning): Only useful when A Verthandi is used as an AI teammate. Allows you to choose between more shield uptime or bulkier shields. A Verthandi as an AI will immediately cast Skill 3 when it goes off cooldown.

Archaic Oath (Thundercall): Only useful when A Verthandi is used as an AI teammate. Allows you to choose between more shield uptime or bulkier shields. A Verthandi as an AI will cast Skill 3 when Divine Grace is maxed.

Darkstar (Demon’s Bawl): Only useful when S Hel is used as an AI teammate. Increases S Hel’s “turret” turn speed as an AI.

Sakubo (Eclipsed Moon): Only useful when A Tsukuyomi is used as an AI teammate. Allows you to choose between Damage over Time (Skill 2) or Burst (Skill 3). A Tsukuyomi as an AI will only cast Skill 2 when Divine Grace is maxed.

Sakubo (Lunar Observer): Only useful when A Tsukuyomi is used as an AI teammate. Allows you to choose between Damage over Time (Skill 2) or Burst (Skill 3). A Tsukuyomi as an AI will only cast Skill 3 when Divine Grace is maxed.

Challenger: Useful if you’re NOT using pink mimir but still need your teammates to die less. Increases AI teammates’ defense as there are fewer enemies on the field.

Emergency Rescue: AI teammates can expend half of their max dodge meter to reduce 1 instance of damage taken by 50% with a 30-second cooldown.

Tactical Assembly: Situationally useful for mob fights, but less effective in boss fights. AI teammates will fight alongside the team leader.

Countermeasure: Useful in mob fights if you’re fielding modifiers with crowd control (CC). Extends Freeze, Stun, Imprison, and Confusion status effects applied by AI teammates by 1 second.

Rift Surge: Situationally provides more survivability to teammates. Extends the invincibility frames provided when teammates rebound or successfully dodge by 1 second.

Hold the Wall: Reduces the duration of abnormal effects (Freeze, Stun, Imprison, Petrify, Trauma, Burn) inflicted on AI teammates by half.

Feedback Force Field: Reduces damage taken by 50% while AI teammates are casting skills with cast times.

Reload Core: Reduces damage taken by 50% while AI teammates are charging attacks.

Power Strike Support: Reduces damage taken by 50% while AI teammates are casting channelled skills.

That’s it for this Aether Gazer Ai Chip Guide

Also Read:

Aaqib Javed

Aaqib is an Noob gamer who loves playing competitive games and RPGs. apart from gaming, he has also written over 500 guides for various gaming websites.

Leave a Reply

Your email address will not be published. Required fields are marked *

Back to top button

Adblock Detected

It looks like you're using an adblocker. Ads keep our content free. Please support us by allowing ads on theclashify.com.